BISHOP STREET BANNER MAKING WORKSHOP PART 3
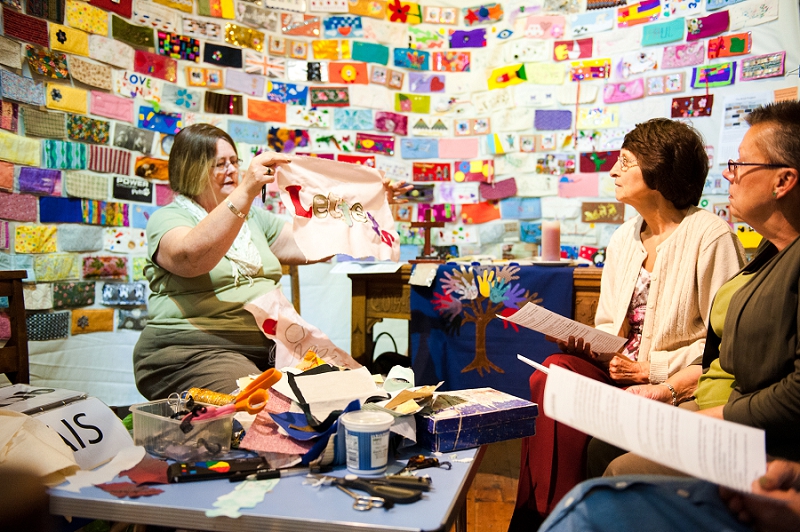
Chris Watkins from the East Leake Banner making group led our third workshop. With many years experience as a textile teacher and accomplished fabric artist Chris inspired us with a vast array of tips and techniques.

Some tips for making Fabric Banners
Written by Chris Watkins
Backgrounds
I would advise the use of woven fabric for the background. A wide variety of woven fabric available from basic calico to expensive jacquards- Woven fabrics are more stable. Stretchy /Knitted fabrics can be stabilised with interfacing but more difficult to work with and I would suggest only used for small areas, i.e. leaves, animals etc
Don’t allow the background fabric to overpower the design- ensure design colours standout. Ensure that the fabric is cut out on the straight grain- running parallel with the threads in the fabric – top to bottom and side to side. Allow extra fabric at edges to turn under or add backing. At least 6” or 15 cms. I have assumed that the final product cannot be washed so a variety of fabrics can be used. If it is intended that the final item may be washable then the fibre content of fabric and the products used is limited.[see Chris.]
Design
Keep designs simple: Templates shapes can be drawn or free designs from internet i.e. leaves, animals, people etc. Note Copyright- it is illegal to use a design unless it is offered as free or permission is granted by the designer. If a group of people are working on a Banner, look at being able to breakdown the design, so several people can work on the design at one time. Make a design of components and then put them all together.
Colour
The use of colour is very important – Background do not want to dominate. Design needs to stand out. Be prepared to move around and play with the elements to get the best result.
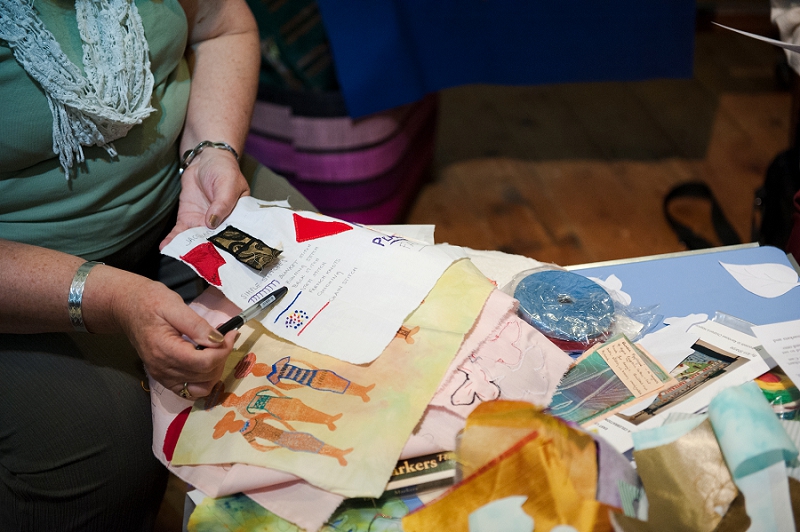
 Chris brought lots of samples to illustrate her talk which included how to transfer photographs onto fabric.
Techniques
Applique: Cutting out fabric shapes and applying to a background, Quilting, stitching lines or a pattern by hand or machine through layers of fabric.
Embroidery: Cross stitch – using even weave fabric and embroidering a design following a chart. Bondaweb – fusable web used to stick shapes onto background using an iron. Can drawn on the paper side- REMEMBER to REVERSE IMAGE.
Fabric paint: Variety available- follow instructions may need to be ironed to set.
Transfer crayons/paint: Similar to wax crayons – design drawn or painted ono parer and ironed onto man-made fabrics – polyester.
Computer transfer prints: Special papers can be bought at good supermarkets and printed on home computer.
Your Photos onto fabric. – several methods ask Chris.

Lettering
Keep straight and look at spacing – measure accurately
Fabric: Cut out letters [use bondaweb [remember to reverse on paper backing] and then couch braid around the edge and stab stitch lettering or use blanket or chain stitch over edge of letters]
Printed letter blocks can be purchased or made from foam sheet
Painted lettering: Plenty of practise and a steady hand needed
Adding decoration
A variety of decorations can be used -beads, sequins, braid cords, tassels, etc Ensure that they are well attached. Use strong thread and sew on well.
Finishing off
Wadding: A layer of cotton/polyester wadding is added to the back of the design, to give extra support and body to the banner.
Backing: A suitable piece of fabric will need to be applied to the back of the Banner.
Bagging out: The backing fabric is placed onto he right side of the fabric and machined around the outside edge, leaving a gap big enough for it to be turned through to the right side. This gap is them hand sewn together. OR The edges can be Bound either using an edge binding or by bring the backing fabric over the edge and on to the front of the Banner.
Weighting: It may be a good idea to add some weight to the bottom of the Banner- this may be a strip of wood or metal which can be enclosed in the bottom hem.
Hanging
Tabs: Pieces of folded fabric applied to top of banner for a piece of wood or metal to be threaded through.
Sleeve: A piece of fabric added to the back of the Banner at the top for a piece of wood to be threaded through.
Poles: Made of Metal or wood- curtain poles can be used/
Further Help
General help with a project and Banner workshops
Contact Chris 01509 821536
Commissions: East Leake Banner group via Chris.

Chris shares an example of a ‘Prayer Flag’

Chris explains how the Banner the group created for English Martyrs was made.

This fabulous book is Chris’s contribution to our Inspired by the Psalms Exhibition currently showing alongside our Banner Exhibition.

The exhibition is up until September 24th 2014 so if you haven’t seen it yet why not pop in and grab a coffee at the same time.

